chainsaw lumber cutting guide
Chainsaw Lumber Cutting Guide⁚ A Comprehensive Overview
This guide explores the art of transforming logs into lumber using a chainsaw. Learn essential techniques, safety measures, and equipment choices for efficient and precise wood milling. Discover how to select the right chainsaw and bar, and master various cutting methods for optimal results.
Choosing the Right Chainsaw and Bar
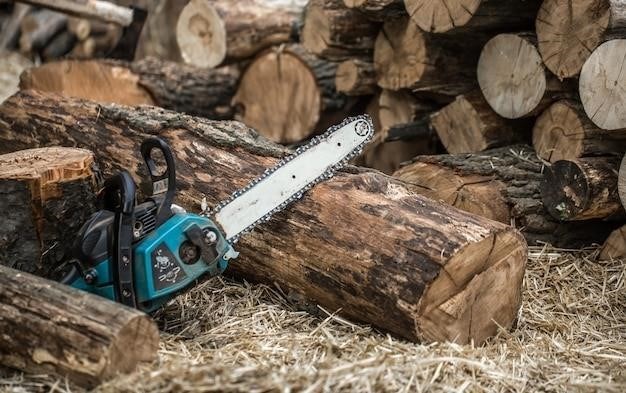
Selecting the appropriate chainsaw and bar is paramount for successful chainsaw milling. Engine displacement significantly impacts performance; a more powerful engine (at least 50cc, ideally 70cc or more) ensures smoother, faster cuts, especially when dealing with larger logs. Smaller engines struggle, consuming more fuel and increasing wear. Consider the size of logs you’ll typically process—larger logs demand more power.
The bar length is equally crucial. Longer bars allow for deeper cuts in a single pass, increasing efficiency, but they also increase the strain on the chainsaw. Choose a bar length compatible with both your chainsaw’s capacity and the dimensions of the logs you intend to mill. Always ensure the bar is properly lubricated to prevent overheating and premature wear.
Finally, the chain type matters. Ripping chains, designed with teeth angled for horizontal cutting, are generally preferred for milling because they provide faster and smoother cuts along the wood grain. However, a standard cutting chain can suffice, though it may require more time and effort. Regular chain sharpening is essential for maintaining cutting efficiency and safety.
Essential Safety Precautions for Chainsaw Milling
Chainsaw milling presents inherent risks; prioritizing safety is paramount. Begin by assessing the work area. Ensure ample, clear space around the log, free from obstructions that could cause trips or falls. Wear appropriate personal protective equipment (PPE), including safety glasses or a face shield to protect your eyes from flying debris, hearing protection to mitigate the loud noise, and sturdy work gloves for improved grip and hand protection.
Before starting, always check the chainsaw’s chain tension and lubrication. A loose or improperly lubricated chain increases the risk of kickback, a dangerous event where the chain suddenly reverses direction. Firmly secure the log to prevent movement during cutting. Use wedges if necessary to keep the log stable and to create space for the bar as you cut.
Maintain a firm grip on the chainsaw throughout the cutting process, using both hands. Avoid reaching or overextending yourself. Never attempt to cut above shoulder height, and take frequent breaks to avoid fatigue, a major contributor to accidents. If you are unsure about any aspect of the operation, consult a professional before proceeding.
Setting up Your Chainsaw Mill⁚ A Step-by-Step Guide
Setting up your chainsaw mill involves several key steps to ensure safe and efficient operation. First, select a level and stable work area, ensuring sufficient space around the log for maneuverability and safety. Securely position the log; consider using wedges to prevent movement during cutting. Attach the guide rail system to the log, ensuring it’s firmly fixed and aligned for straight cuts. Proper alignment is critical for producing uniform lumber.
Next, carefully attach the chainsaw to the mill’s frame, following the manufacturer’s instructions precisely. This typically involves securing the chainsaw’s bar and clamping the body to prevent movement during operation. Ensure the chain is properly tensioned and lubricated; a well-maintained chain contributes to smoother cuts and reduces the risk of kickback. Double-check all connections before starting the chainsaw to avoid potential hazards during operation.
Before making your first cut, practice a few test cuts on scrap wood to get a feel for the mill’s operation and the chainsaw’s responsiveness. Familiarize yourself with the controls and ensure you are comfortable with the setup and cutting process before working on the actual log. Remember, proper setup is crucial for both safety and successful lumber milling.
Different Types of Chainsaw Mills and Their Applications
Several chainsaw mill types cater to various needs and log sizes. The Alaskan mill, a popular choice, uses a simple design with adjustable rails for precise cuts. Its portability and ease of use make it ideal for smaller-scale operations and individual projects. For larger logs and increased production, consider a larger capacity mill with longer guide rails and a more robust build. These typically employ a more complex system for guiding the chainsaw.
Another type is the band saw mill, utilizing a continuous band blade for smoother, faster cutting. This offers advantages in terms of speed and cut quality, particularly for intricate shapes or fine lumber. However, band saw mills are generally less portable and more expensive than Alaskan mills. The choice between these options depends on factors like log size, desired output, budget, and the operator’s experience level.
Some mills incorporate features for added precision, such as adjustable depth settings for varying board thicknesses. Others provide options for cutting various angles, enhancing their versatility for specialized projects. Researching available models and their specifications will help determine which mill best suits your individual requirements and woodworking goals.
Techniques for Precise Cutting and Avoiding Common Mistakes
Mastering precise chainsaw milling involves a combination of technique and preparation. Begin by ensuring the log is securely positioned and the mill is properly aligned. Maintain a consistent pace and avoid forcing the saw; let the chain do the work. Smooth, controlled movements are crucial for clean cuts and preventing kickback. Start and finish each cut with deliberate care to minimize tear-out and ensure even board thickness. Regularly check the chain’s sharpness and tension; a dull chain increases effort and the risk of mistakes.
Understanding wood grain is paramount. Cut with the grain whenever possible to avoid binding and splintering. Identify knots and other imperfections beforehand to plan your cuts accordingly. If encountering a knot, carefully adjust your technique to avoid damaging the saw or the wood. For thicker logs, consider multiple passes to avoid overtaxing the chainsaw. Practice makes perfect; begin with smaller logs and gradually increase size as your skills develop. Remember safety is paramount⁚ always wear appropriate protective gear.
Common mistakes include rushing the process, applying excessive pressure, or using an improper chain. By focusing on these techniques, and taking your time, you can significantly improve both the quality of your cuts and the safety of your operation.

Maintaining Your Chainsaw and Mill for Optimal Performance
Regular maintenance is crucial for both your chainsaw and milling equipment to ensure optimal performance, safety, and longevity. Start by cleaning your chainsaw after each use, removing sawdust and debris from the bar, chain, and engine. Sharpen or replace the chain regularly; a dull chain requires more effort, increases the risk of kickback, and produces inferior cuts. Check and adjust chain tension according to the manufacturer’s recommendations. Lubricate the bar and chain frequently with high-quality bar oil to prevent premature wear and tear.
Inspect the chainsaw’s air filter and clean or replace it as needed. Ensure the fuel mixture is correct, and the spark plug is clean and properly gapped. For the milling apparatus itself, inspect all bolts, clamps, and other fasteners for tightness and replace any damaged or worn parts. Clean any accumulated sawdust or debris from the mill’s guide rails and moving parts. Proper storage is also important; keep your chainsaw and mill clean and dry in a secure location to prevent rust and corrosion.
By following these simple maintenance steps, you’ll significantly extend the life of your equipment and ensure it performs at its best, resulting in smoother, safer, and more efficient milling operations.
Understanding Wood Grain and its Impact on Cutting

Understanding wood grain is paramount for successful chainsaw milling. Wood grain refers to the direction of the wood fibers, influencing the wood’s strength, durability, and how it reacts to cutting. The grain’s direction significantly impacts the ease and quality of your cuts. Cutting with the grain (following the direction of the fibers) generally results in cleaner, smoother cuts with less resistance. This is often referred to as “ripping” in woodworking terminology. Conversely, cutting against the grain (perpendicular to the fibers) is more challenging, often leading to splintering, tear-out, and increased effort. This is known as “cross-cutting”.
Different wood species exhibit varying grain patterns; some are straight, while others are more complex, featuring knots, swirls, or figure. Knots, in particular, present a challenge during milling. They can cause binding, dulling of the chain, and potentially dangerous kickback. Careful planning and technique are essential to navigate these complexities safely and effectively. Identifying the grain direction beforehand helps you plan your cuts to minimize tear-out and achieve the desired results. Observe the end grain of the log to determine the primary grain direction before commencing any milling operations.
Mastering the relationship between your cutting direction and the wood grain is vital for achieving clean, precise cuts and maximizing the yield of usable lumber from your logs.
Tips for Milling Different Types of Wood
Milling various wood types requires adapting techniques to account for their unique properties. Hardwoods, like oak and maple, are denser and more challenging to cut than softwoods such as pine or fir. Expect increased resistance and potential for dulling your chain when working with hardwoods. Slower, more deliberate cuts are crucial to prevent binding and ensure a clean finish. Pre-drilling pilot holes near knots in hardwoods can help prevent splitting. Softwoods, while easier to cut, can be prone to tear-out if not handled carefully. Maintaining a sharp chain is essential for both hardwood and softwood milling to minimize tear-out and ensure clean cuts.
Consider the moisture content of the wood. Green (freshly cut) wood is more challenging to mill due to its higher moisture content, leading to increased resistance and the potential for binding. Allowing the wood to dry partially before milling can improve the process significantly. Always wear appropriate safety gear, including eye protection, hearing protection, and chainsaw chaps, regardless of the wood type. Different woods have unique grain patterns; understanding these patterns and adjusting your cutting strategy accordingly is vital for achieving the best results. For instance, highly figured wood might require more cautious cuts to avoid damage to the aesthetic qualities of the wood.
Adapt your approach based on the wood’s characteristics to ensure efficient and safe milling.
Finishing Your Lumber⁚ Drying, Planing, and Other Processes
Once your lumber is cut, proper finishing is crucial for its longevity and usability. Air drying is the most common method, allowing the wood to gradually release moisture over time. Stack the boards with spacers to ensure airflow and prevent warping or cracking. The drying time depends on factors like wood species, thickness, and environmental conditions; it can take weeks or even months. For faster drying, consider kiln drying, a controlled process that accelerates the moisture removal but requires specialized equipment. After drying, planing is essential to achieve smooth, even surfaces. A hand plane or a power planer removes any imperfections or saw marks left during milling, creating a professional finish.
Further processing might include sanding to achieve a desired level of smoothness, depending on the intended use of the lumber. For finer projects, consider using progressively finer grits of sandpaper. Depending on the final application, you may want to apply a finish, such as paint, stain, or sealant, to protect the wood from moisture, insects, and UV damage. Choosing the right finish depends on factors like the type of wood and the intended use of the finished product. Always follow the manufacturer’s instructions when applying any finishes. Proper finishing enhances the lumber’s appearance, durability, and overall value, transforming rough-cut boards into high-quality woodworking materials.
